Mastering Multiple Candlestick Patterns: Engulfing, Piercing, Dark Cloud Cover & More
Introduction
Candlestick charts are one of the most powerful tools in technical analysis. While single candlestick formations like the hammer or shooting star provide useful signals, the real depth of market psychology often emerges when two or more candles combine to form multiple candlestick patterns. These patterns reveal battles between buyers and sellers across consecutive sessions, offering traders valuable insights into potential reversals or continuation of trends.
In this article, we’ll explore the most widely used multiple candlestick patterns—bullish engulfing, bearish engulfing, piercing, dark cloud cover, and the role of doji formations. We’ll break down how they form, what they signify, and how traders can use them to design effective strategies. By the end, you’ll have a comprehensive understanding of how to integrate these signals into your trading plan.
1. Understanding Multiple Candlestick Patterns
Unlike single candlestick setups, multiple candlestick patterns require at least two trading sessions to evolve. This means traders must observe how price action develops over consecutive days (or shorter timeframes in intraday trading). The interaction between candles reflects shifts in sentiment:
- Bullish signals often appear after prolonged downtrends, suggesting buyers are regaining control.
- Bearish signals typically emerge at the top of rallies, hinting that sellers are overpowering buyers.
- Indecision signals like doji candles can amplify the strength of reversal patterns when they appear in sequence.
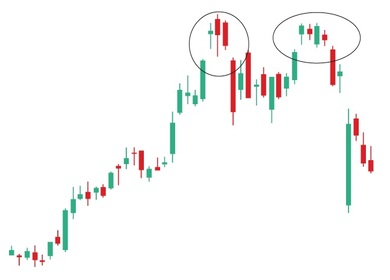
2. The Bullish Engulfing Pattern
Formation
- Appears at the bottom of a downtrend.
- The first candle (P1) is bearish, closing lower than it opened.
- The second candle (P2) is bullish and completely engulfs the body of P1.
Psychology
The bearish candle confirms ongoing weakness. On the following day, buyers step in aggressively, pushing prices above the previous open. This sudden shift rattles sellers and signals a potential reversal.
Trading Strategy
- Entry: Traders often buy near the close of P2 or wait for confirmation on P3.
- Stop Loss: Placed at the lowest low between P1 and P2.
- Target: Resistance levels or Fibonacci retracements can serve as profit zones.
3. The Bearish Engulfing Pattern
Formation
- Appears at the top of an uptrend.
- P1 is bullish, closing higher than it opened.
- P2 is bearish and its body fully engulfs P1.
Psychology
The bullish candle shows buyers in control. On the next day, sellers overwhelm the market, closing below the prior open. This creates panic among bulls and signals a potential downward slide.
Trading Strategy
- Entry: Short positions are initiated at the close of P2 or after confirmation on P3.
- Stop Loss: Placed at the highest high between P1 and P2.
- Target: Support levels or prior swing lows.
4. The Piercing Pattern
Formation
- Occurs after a downtrend.
- P1 is bearish.
- P2 is bullish but only covers 50–100% of P1’s body (not fully engulfing).
Psychology
This pattern suggests buyers are attempting to reverse the trend but haven’t completely overpowered sellers. It’s weaker than a bullish engulfing but still indicates potential upside.
Trading Strategy
- Entry: Buy near the close of P2 if it covers at least half of P1’s body.
- Stop Loss: Placed at the low of the pattern.
- Target: Nearby resistance levels.
5. The Dark Cloud Cover
Formation
- Appears after an uptrend.
- P1 is bullish.
- P2 is bearish, covering 50–100% of P1’s body but not fully engulfing.
Psychology
This pattern is the bearish counterpart of the piercing pattern. Sellers step in strongly but don’t completely dominate. It signals caution for bulls and potential reversal.
Trading Strategy
- Entry: Short near the close of P2.
- Stop Loss: Placed at the highest high of the two candles.
- Target: Support zones or moving averages.
6. The Role of Doji in Multiple Patterns
A doji represents indecision, where the open and close are nearly identical. When a doji follows an engulfing pattern, it magnifies uncertainty and often precedes a sharp move.
- After a bearish engulfing, a doji may confirm panic among bulls, leading to stronger declines.
- After a bullish engulfing, a doji may show hesitation before buyers regain confidence.
7. Combining Patterns for Stronger Signals
Traders often combine candlestick patterns with other tools:
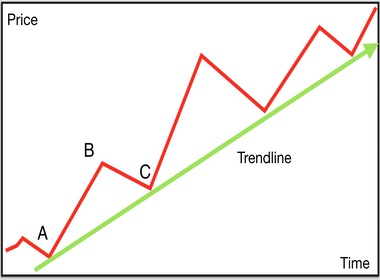
- Support and resistance: Engulfing patterns near key levels are more reliable.
- Moving averages: Confirmation of trend reversals is stronger when aligned with MA crossovers.
- Volume analysis: High volume during engulfing patterns adds credibility.
8. Risk Management
Candlestick patterns are not foolproof. False signals occur frequently, especially in volatile markets. To manage risk:
- Always use stop losses.
- Avoid trading patterns in sideways markets.
- Combine candlestick analysis with broader technical indicators.
9. Timeframes and Applications
- Daily charts: Best for swing traders.
- Intraday charts (5–15 min): Useful for scalpers and day traders.
- Weekly charts: Provide long-term signals for investors.
10. Common Mistakes to Avoid
- Misidentifying patterns when shadows overlap but bodies don’t.
- Ignoring prior trend direction (engulfing requires a clear trend).
- Trading without confirmation from other indicators.
Conclusion
Multiple candlestick patterns are essential tools for traders seeking to understand market psychology. The bullish engulfing and bearish engulfing are among the most powerful reversal signals, while the piercing pattern and dark cloud cover provide nuanced insights. When combined with doji formations, these patterns can highlight moments of indecision that precede major moves.
By mastering these setups and integrating them with risk management and supporting indicators, traders can significantly improve their decision-making process. Remember, candlestick patterns don’t guarantee outcomes—they simply tilt probabilities in your favor. With practice, patience, and discipline, they can become a cornerstone of your trading strategy.